Sunday 8 February 2015

How to make good Rabbit Ears: Alice in Wonderland photoshoot styling


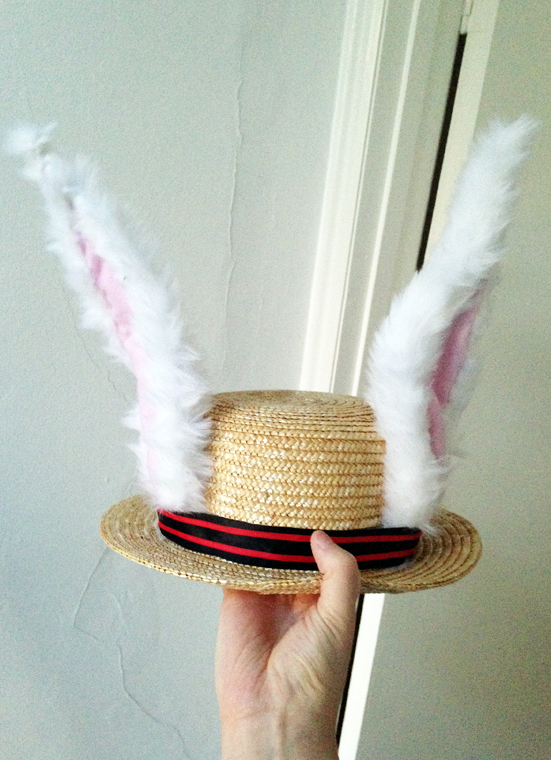
You may think my title a bit arrogant, but I can't tell you how many hideous rabbit masks I have come across styling this shoot. So creepy. I ended up making this just in case...!

It's a useful one to know as it's so adaptable and I have been surprised at the number of times I have required animal ears of some sort in recent years.

You will need:

  • 1/4m luxury white faux fur (good quality stuff is SO much better to work with and looks more realistic.)
  • 1/4m pale pink felt
  • florist's wire
  • sharpie
  • dressmaking scissors
  • pattern paper (or a piece of paper large enough to make a template
  • needle and white thread
  • all purpose glue

How to do it:

  1. Fold a piece of pattern paper in half and draw your ear shape on it. Cut out and you will have two mirror image templates for your ears.
  2. Place your fur right side down, place each template on the fur and draw around.
  3. Cut out the fur leaving a 1.5 cm seam allowance all the way round.
  4. Shape your wire to follow the line of the template, leave the ends protruding out of the bottom. sew this wire in place all around the template line. 
  5. Use your paper templates again to make inner ears out of the pink felt. Make sure you get two mirror image ears again. Draw around with the sharpie and cut out.
  6.  Glue your piece of felt on top of the wrong side of the fur. It will cover the wire. 
  7. Start to roll the fur in around the edges sewing a slip stitch as you go. Continue this all the way around on both ears.
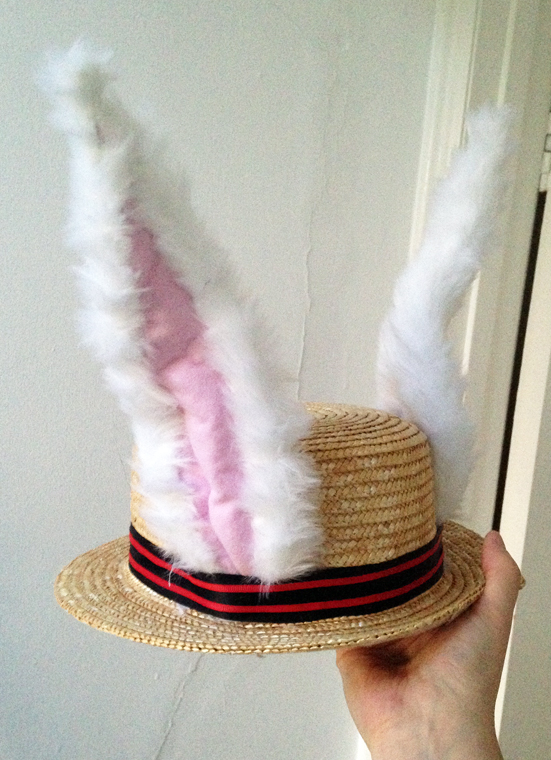
  8. I fixed the ears to an old boater. I cut two 'mouse hole' shapes in the boater, fed the ears in and glued wherever I could. To make sure the ears aren't uncomfortable on the inside of the boater, keep the inner band intact. I also wrapped a new ribbon around the hat to help keep the ears in place.
  9. With wire in the ears you can bend them into any shape you want!


Thursday 5 February 2015

How to make beautiful Hair bows: Alice in Wonderland Photoshoot styling: Behind the scenes

Another make from the Alice in Wonderland photoshoot Vault. 

There were some lovely bows, here are a few more we made for Alice, just in case!


When styling outfits for shoots you always need 2nd, 3rd, maybe 4th choice options for the outfits. I think this goes for the accessories, surely they are affected by which outfit is chosen. Therefore I took great pleasure in having a play around with some Alice bows that could be quickly fixed to a hairband on location or pinned into the model's hair.


You will need:

  • assortment of ribbon, you don't need more than 1/4 m for any of these.
  • needle and matching thread.
  • pinking shears


  1. Choose the ribbon for the main body of the bow. I went for a pale blue 1 inch thick and then layered it up with a thinner textured/patterned grosgrain ribbon.
  2. Cut 25cm length of each with pinking shears to stop ends fraying. Both right sides up, place one on top of the other, matching up the ends.
  3. Fold the ends around the back and into the centre (make sure there is a little bit of overlap) and press a concertina fold in the centre.
  4. Secure in place with needle and thread. Don't cut the thread, keep the needle in play. now take a 1cm black ribbon to wrap around the centre of the bow. Place it at the back of the bow and sew in place with a few stitches. Now wrap it around the bow centre at least 2 times. 
  5. With the needle and thread still attached, secure this central ribbon with a few more stitches. Cut off the ribbon end with pinking shears. Cut the thread.
  6. These bows can easily be sewn onto padded fabric 'alice bands' or you can slip a clip or pin through the back black ribbon loop to wear the bow as a hair slide.


Tuesday 3 February 2015

The Bristol Magazine style file February Issue.

Photo Amanda Thomas
The February issue of the Bristol Magazine Style file is out now.

Focussing on Winter Whites. Here I am wearing a beautiful knitted dress by Amber Hards Knitwear, a cream leather jacket from Molly Mishi May, Jeans from GAP, and a silver crackle clutch bag from John Lewis at The Mall Cribbs Causeway.

Here is a little more about my hair and makeup and a few sneaky behind the scenes shots! Shot against the beautiful William Morris 'Strawberry Thief' wallpaper at the Bristol Belgian Beer Bar of the same name.
The team: Harriet, Shari, Ella, Amanda
'sell sell sell'

The Strawberry Thief Bar is opposite the beautiful Palestinian Embassy Building
Shari Knowles was on hand again to make me look fresh faced and gorgeous. Here is what she did:

- The overall look is a modern daytime glam using colours from the season in a wearable way.
- I prepped the skin with a skin repair moisturiser which doubles as a primer. 
- The skin has a nice satin finish from using creamy foundations. I used the Bobbi brown foundation stick. 
- to brighten the under eyes, I also used a tinted eye brightener from Bobbi brown. It helps to neutralise dark circles but it's lovely and lightweight. 
- The look revolves around a bold lip to contrast the neutral tones of the cream and white - A fun way to use colour for winter. I used 'Italian Rose' from Bobbi Brown. 
- To balance the warm tone of the lipstick, I lined the lashline with a rich brown gel liner. It still defines the eyes but is a nice alternative to black. (Neutral lids and mascara)
- with a strong colour on the lips, the cheeks only require the slightest dusting of a pale rose blush. 

Do you have a wardrobe query you would like me to help with? email me at harriet@harrietdewinton.com